Permission Management
Linking users to roles not just because it will make it easier to group them by their roles but also because we apply the role-based access control (RBAC) mechanism in FreeAuth to restrict system access, which means users are granted permissions based on the roles they have. Next, let's learn how to create permissions and assign them to a role.
Data Table
Enter the permission management panel from the left sidebar menu. You will see a central table that lists all the permissions available. You may notice that there have been several default permissions existing in the table. They are precisely the permissions that control all existing features in FreeAuth. For instance, manage:users is the one that controls access to the user management page and its related actions.
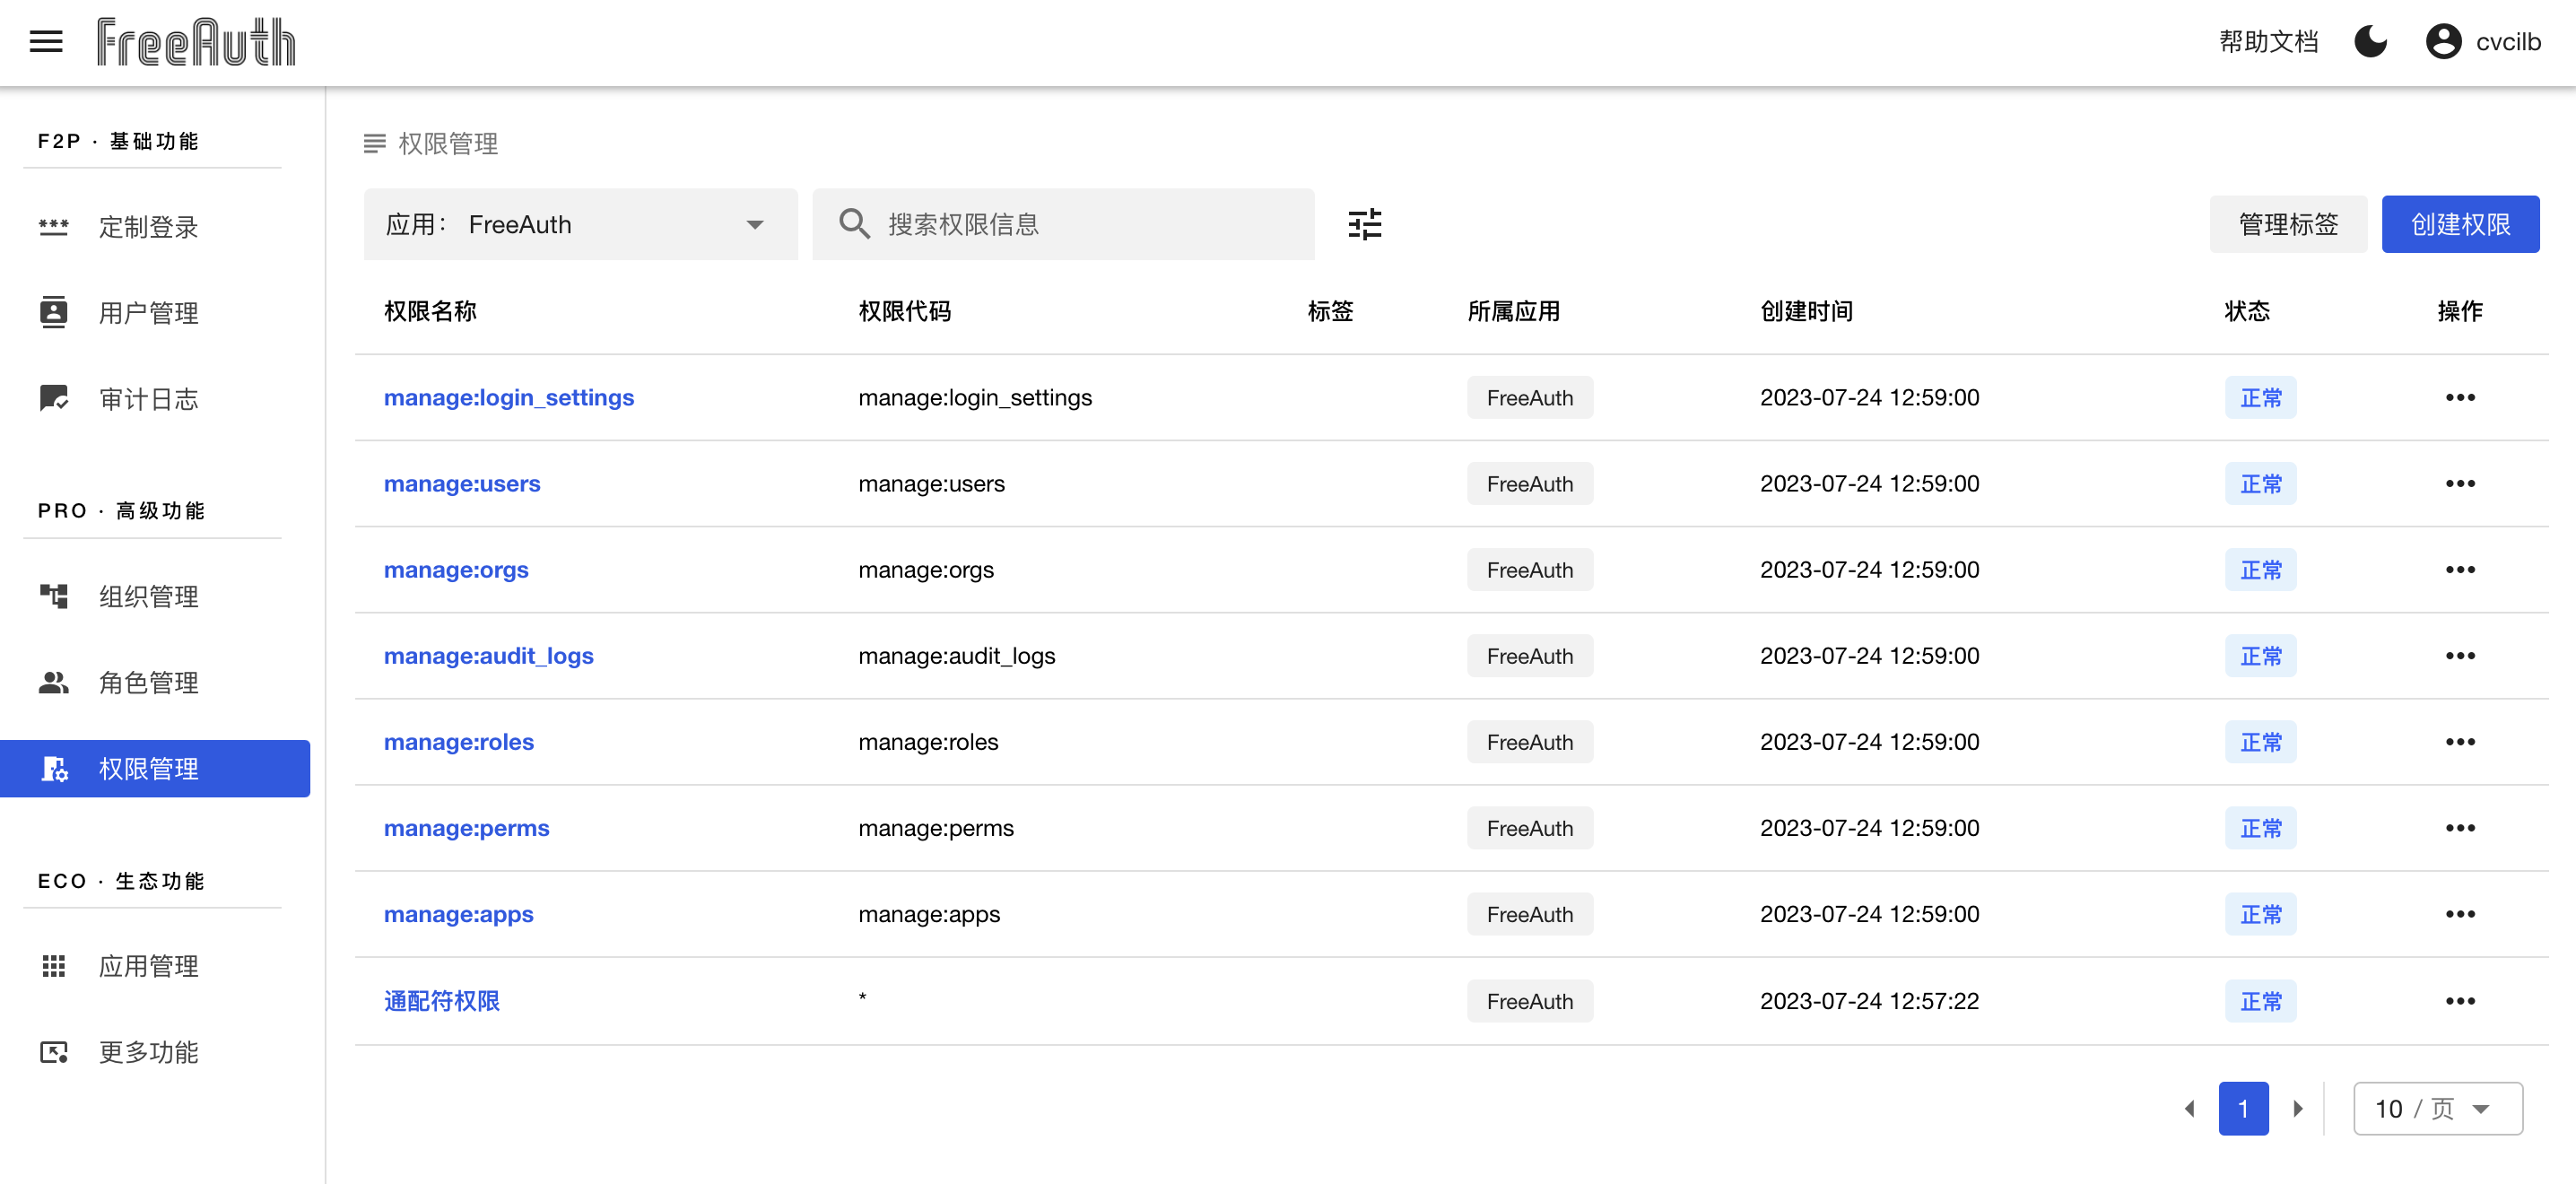
Like the other management tables, you can filter, search, sort, and manipulate the data. Each permission also has its own details page. To avoid repetition, we won't explain these basic features again. However, it's necessary to emphasize the field 权限代码. It is designed to be used by your future application code to rule out unauthorized access. For example, the existing permission manage:roles in the table controls access to role management and all role operations. We define its 权限代码 on the admin site and also need to write it in the application code for features to function properly.
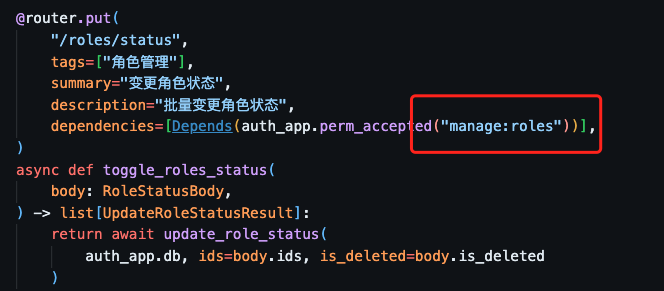
Therefore, once a permission's 权限代码 has been written in your code, you should be more cautious about changing it from the admin site. If you do make changes, do not forget to update where it is referred to in your source code. Otherwise, even if you assign this permission to a user through a role, they won't truly have access to the corresponding feature because your application code is still using the old 权限代码. For instance, FreeAuth has implemented the "role management" feature and named a permission to manage:roles to control its access. Then, you update its 权限代码 from manage:roles to manage: identities. If FreeAuth's source code isn't updated accordingly, you will lose access to the role management panel but get a new permission named manage: identities without any real authority.
About Application
As you can see, the table of permissions is similar to other tables we've mentioned before. However, there are a few notable differences worth further explanation. The first is an application selector on the top left of the central table. By default, it is set to FreeAuth. This is actually prepared for future use. In fact, FreeAuth is currently a framework that incorporates access control. Whoever downloads its source code can directly make the second development based on it to suit their specific application needs. In our plan, the FreeAuth will also be able to function as an independent service in the future, with the ability to support single sign-on for multiple applications. That's why there is an application selector, and we will also implement a management table for the data of applications. By that time, you can create as many applications as you need and get a unique AppID and AppSecret for each of them. This pair of keys will be used to knock FreeAuth open and fetch the user's identity. Now, we suggest you folk/download FreeAuth and develop your new features directly on it.

Permission Tag
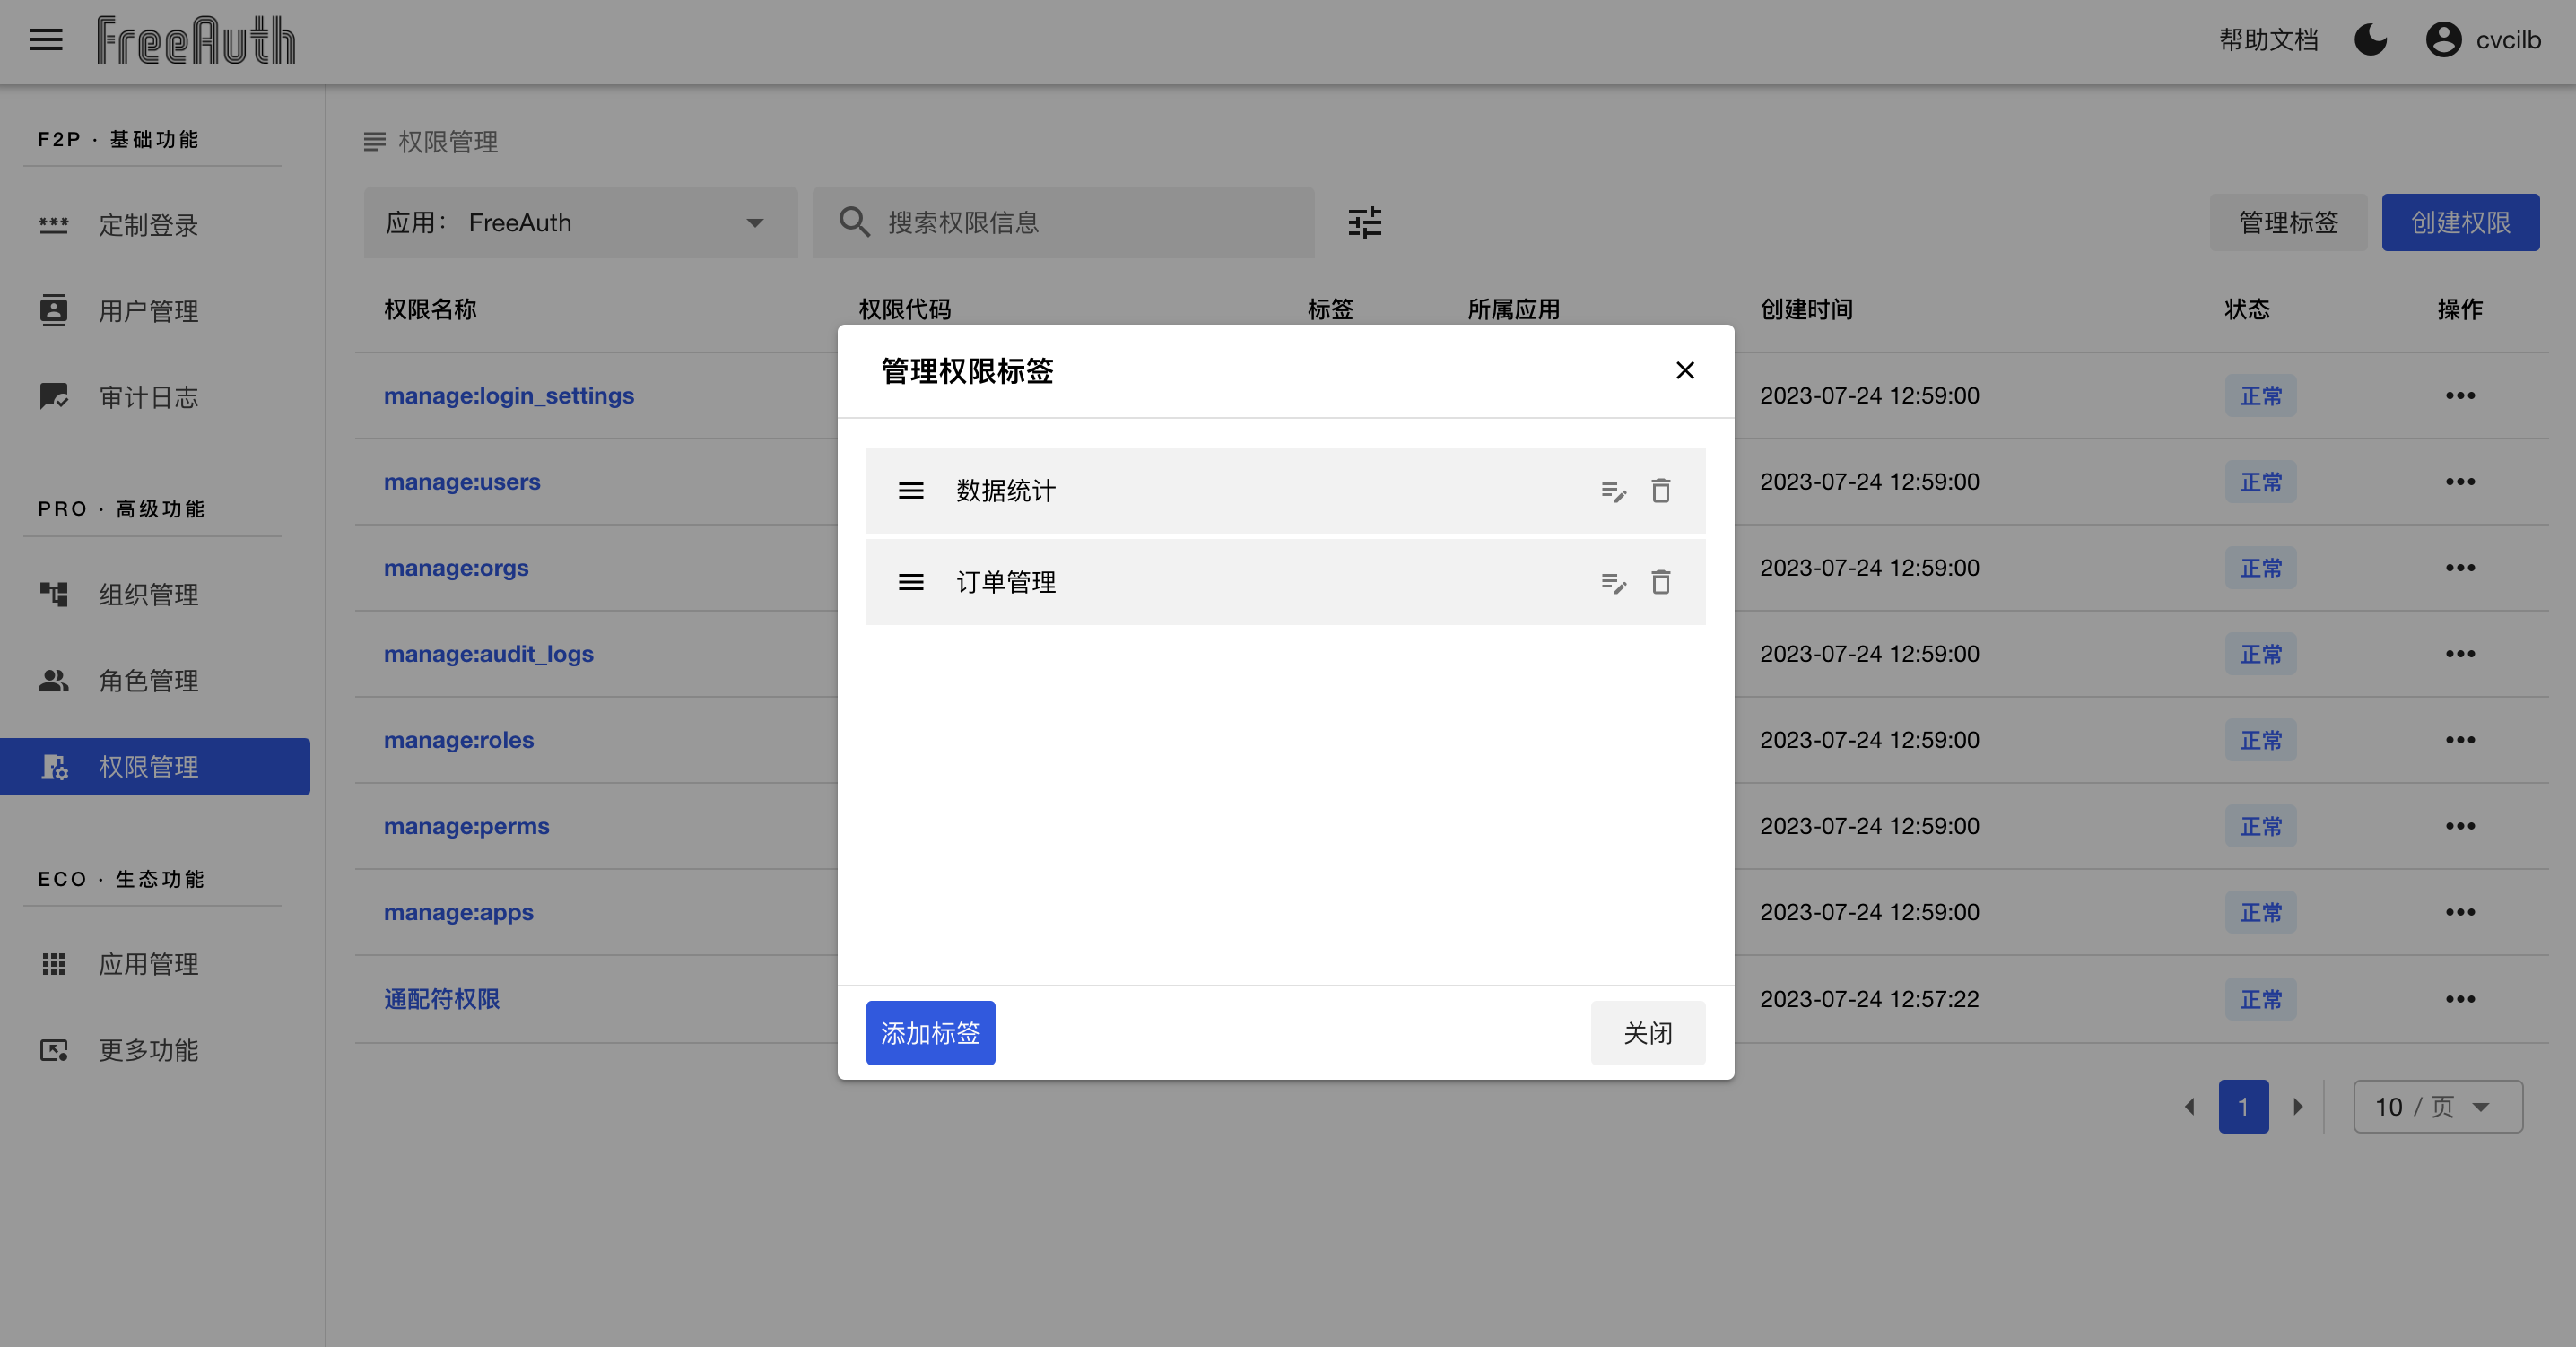
The other significant difference is the button 管理标签 located at the top right of the central table. Additionally, there is a field named 权限标签 visible in the table. It's worth noting that one permission can have multiple tags, which are utilized to categorize permissions.
To manage all permission tags, click the aforementioned button 管理标签. This action will open a dialog box, like the image displayed below. In this dialog, you are allowed to create, delete, and edit tags, as well as re-sort their order through drag and drop.
In the following section, we will discuss where these tags can be used.
Create a Permission
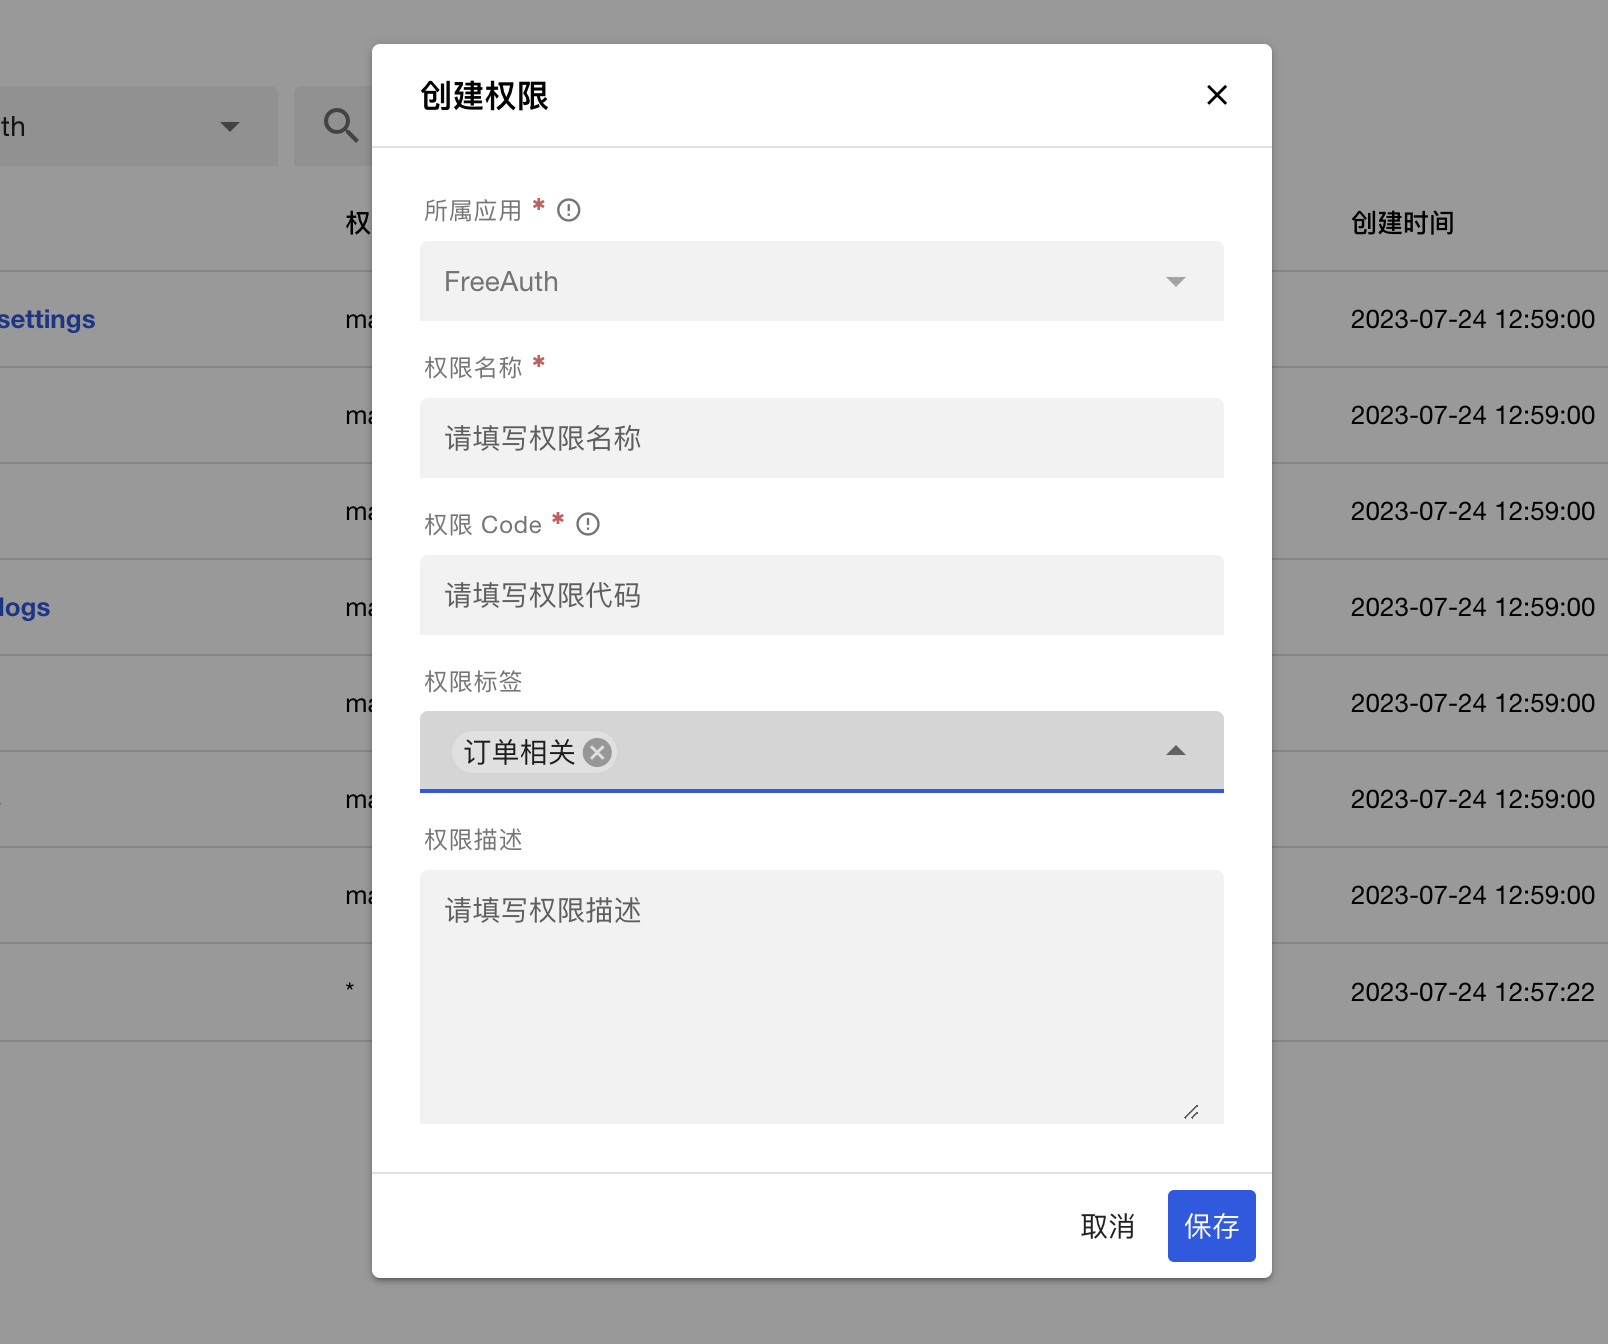
If you plan to develop a new feature on FreeAuth, you will usually need to create a new permission to regulate access to that feature. To create a new permission, click the button 创建权限 next to 管理标签 on the top right of the permission table, and you will see the form shown in the following image. The most critical field in the form is 权限代码 we mentioned previously. Make sure you give it a meaningful name to improve the readability of your code.
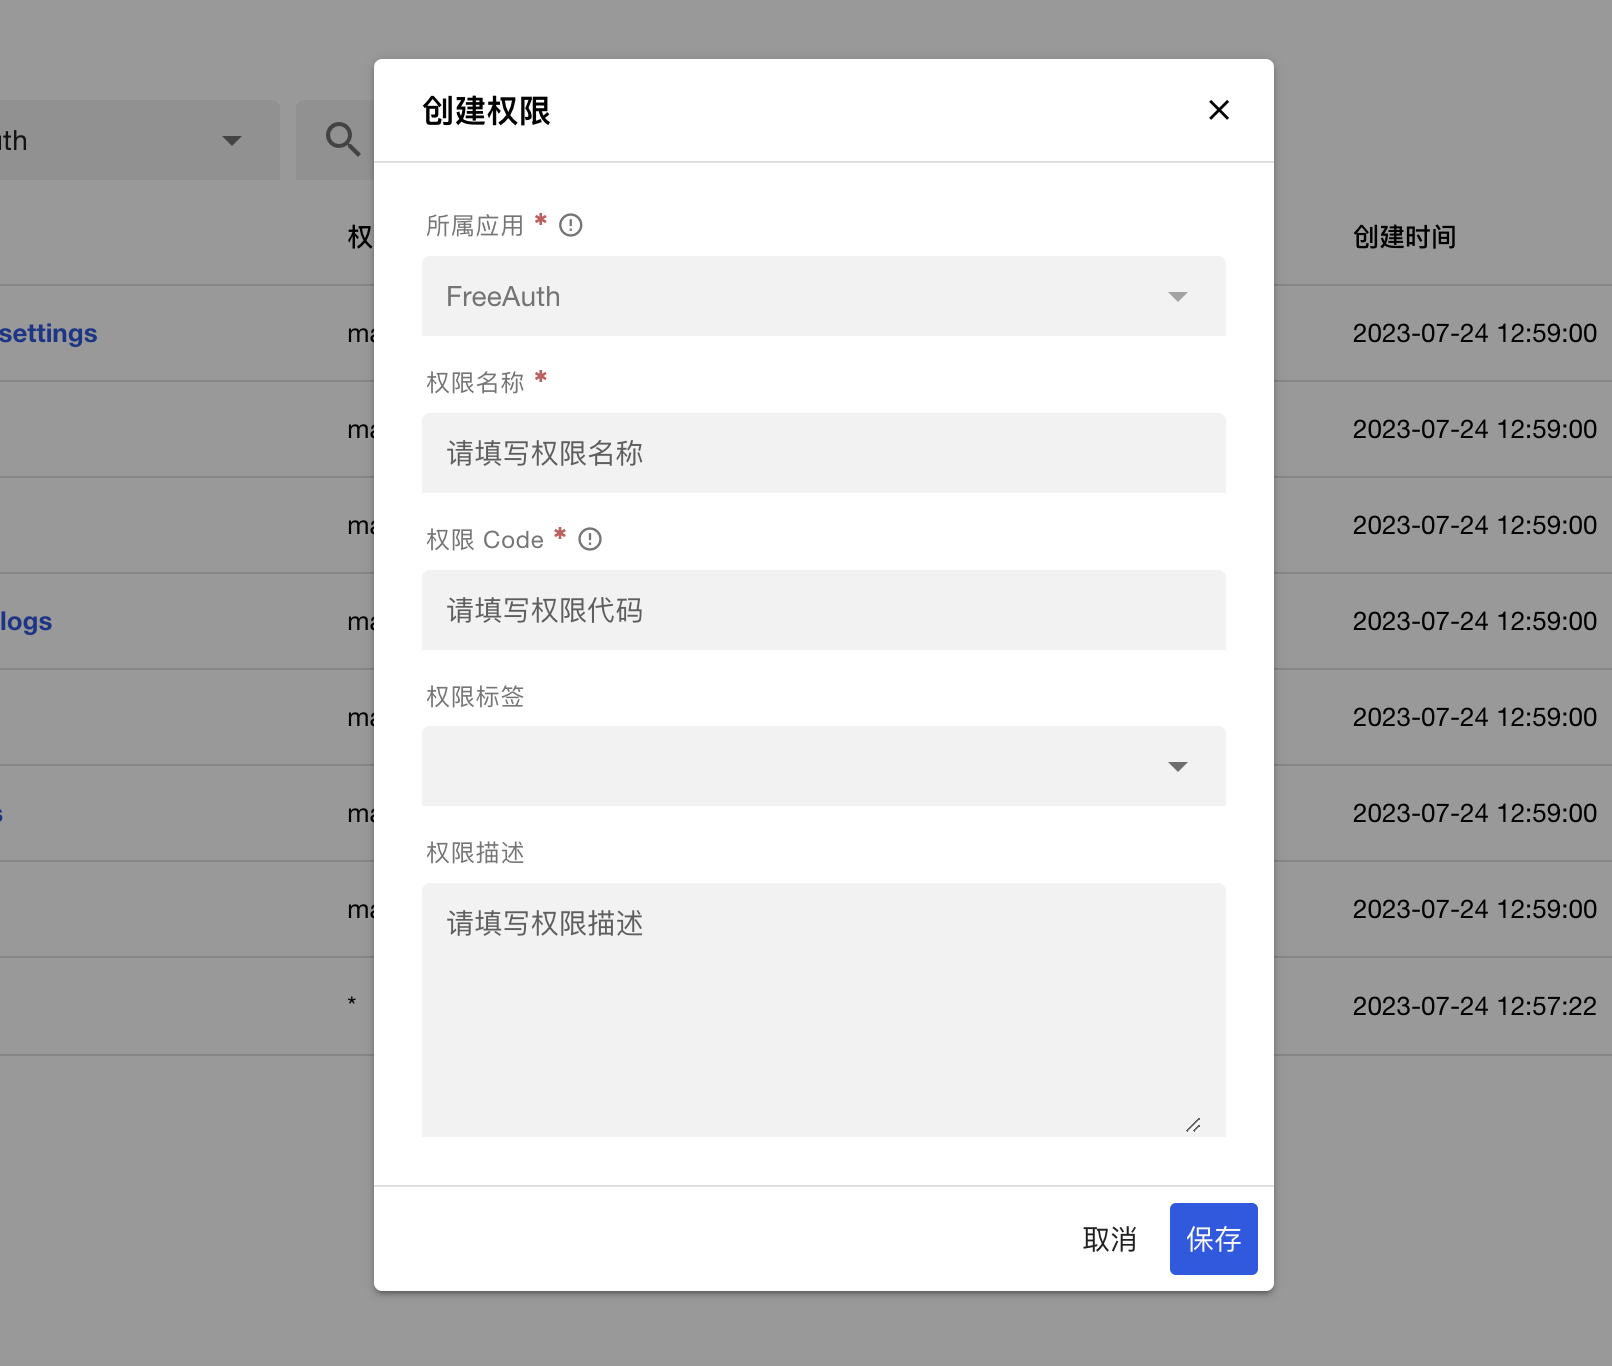
The field 权限标签 is optional. Click on it to see all available options, and you can choose multiple tags. If none of the options are suitable, you can enter the new tag's name directly in the box. After pressing the Enter key, this new tag will be added to the box. However, it doesn't mean this tag has been inserted in your database until you click the save button of this form, even if it appears in the form. Only after you click the save button will the new tag and permission be saved.
Set Permissions
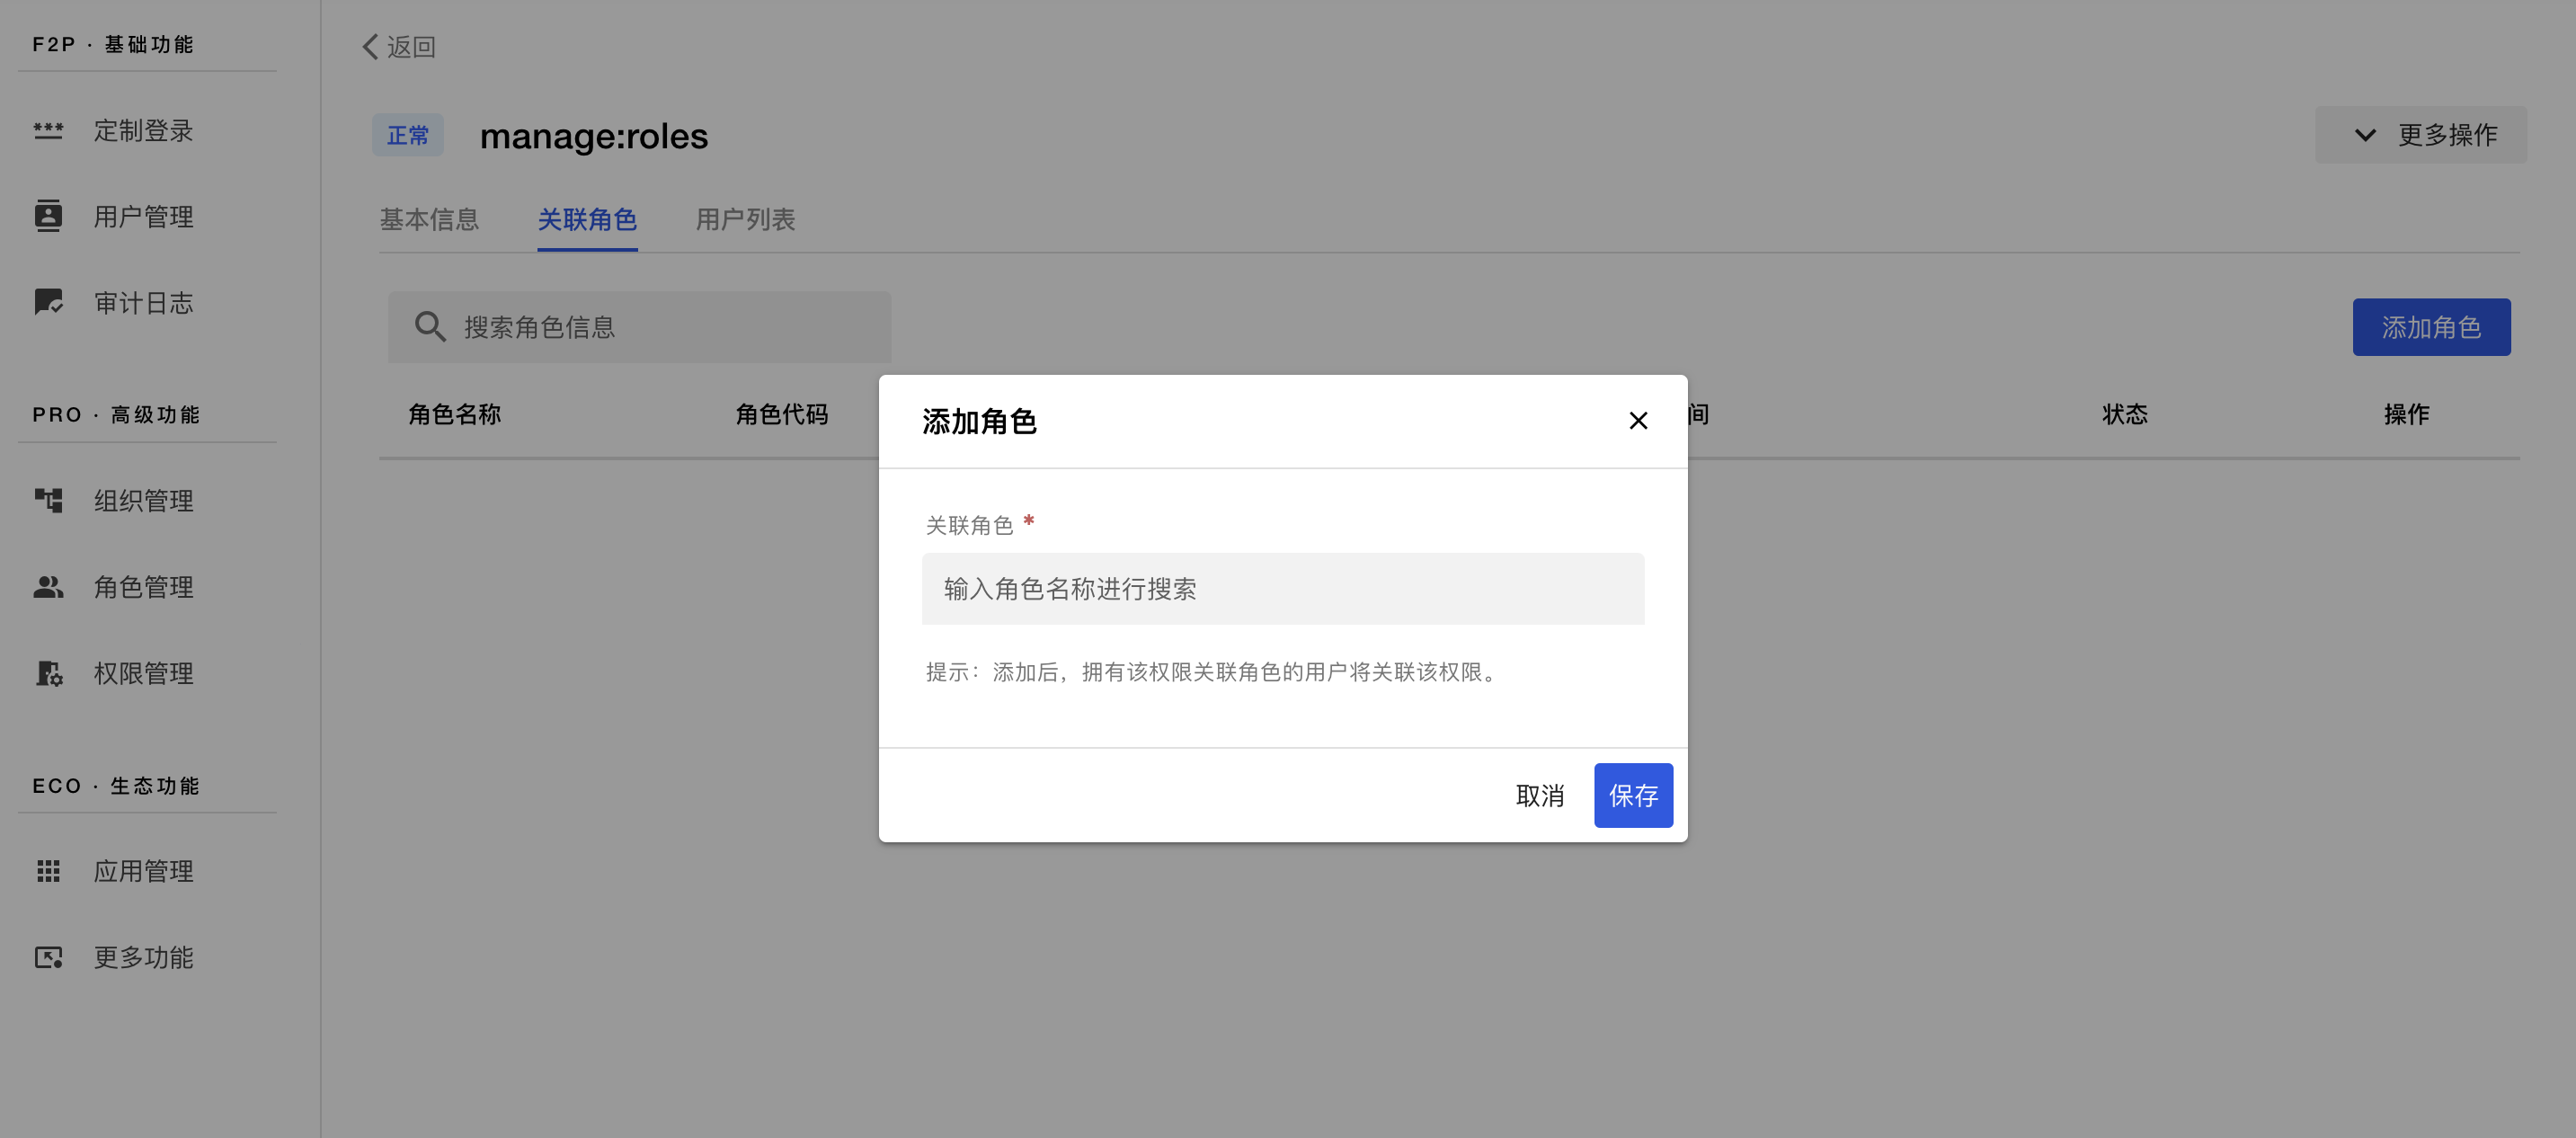
We now have roles and permissions ready. There are two ways to set up relationships between roles and permissions. One way is to add roles to a specific permission. Enter the details page of the target permission, switch the tab to 关联角色. Then, you will see the button 添加角色 in the top right corner. Click on it, and finish the rest.
The other way is to check all required permissions for a specific role. Enter the details page of the target role, switch the tab to 配置权限. Then, you will see all permissions listed in a table, and each permission row has a checkbox at the start, which can be ticked to include the permission or unticked to remove the relationship between the permission and the current role. Note that if a role already has the permission 通配符权限, it doesn't need to bind other permissions because 通配符权限 covers all the other permissions under the same application.
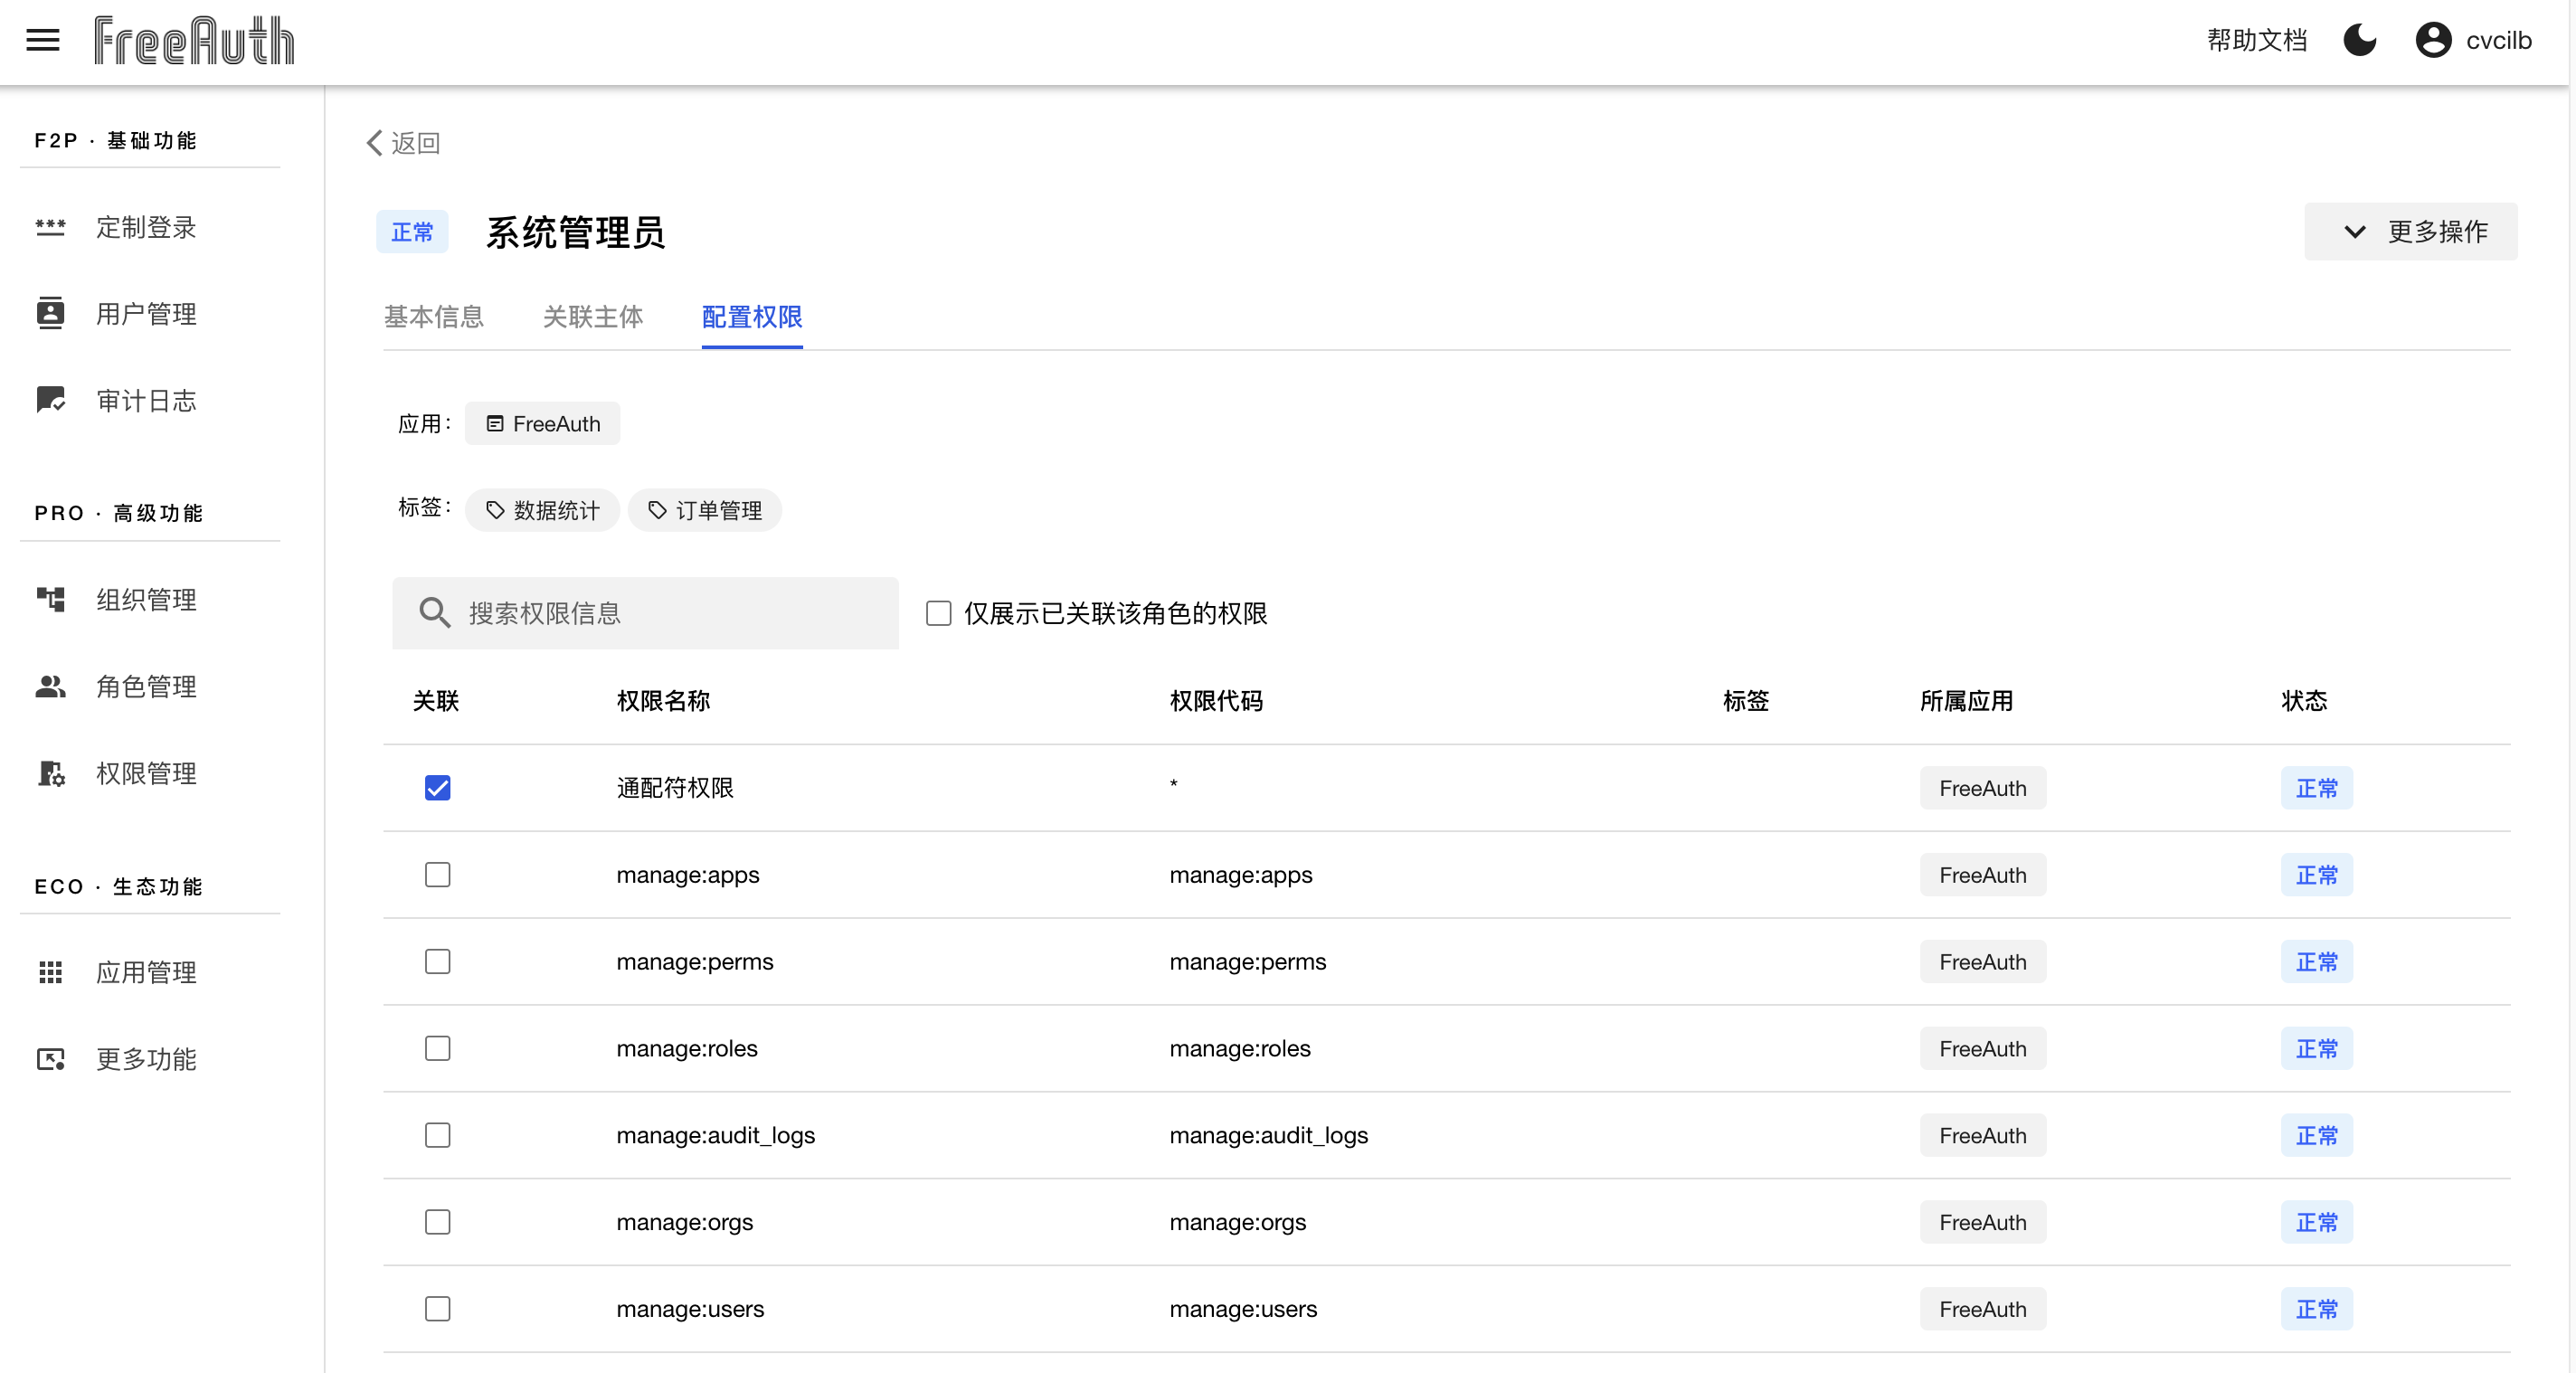
To quickly locate permissions, you can either search for an appropriate keyword or narrow down the results using the tag filter.
If you need to check what permissions a user has, you can access their details page and switch to the tab 权限信息. The panel will list all their permissions due to the bound roles. You don't have to check all their roles and remove duplicated permissions manually.
