User Management
User Management is where to manage users' data. Click on 用户管理 in the sidebar menu to get into its panel. You will see most management panels in FreeAuth have a similar structure, which includes a central table displaying the data, a search box at the top left of the table for searching, a combinational filter icon next to the search box, and a group of operational buttons on the top right of the table.

Data Table
The data is organized into columns with varying information. Within these columns, there are three types of cells. The first type is the clickable information cell, like 姓名 shown in the above image. This cell displays the user's name and provides access to its details page. The second type is the plain text cell, such as 手机号, 邮箱, etc. These cells are solely for displaying information. The third type is the actions cell, typically indicated by the icon ··· at the last column of each row. Clicking on it will reveal a dropdown menu with options for manipulating data in its row. Note that a user named FreeAuth管理员 has been in the table, precisely the one you currently use to log in to the system.

Then, let's go over the meaning of each field in the user management table:
- 勾选框/checkbox: These checkboxes allow multiple rows to be selected, enabling multiple pieces of data to be operated on at once.
- 姓名/name: This is more like a nickname.
- 用户名/username: This is used for logging in to the system if the username and password login mode is enabled.
- 手机号/mobile phone number: This can be used to receive a verification code when signing in or signing up.
- 邮箱/email: This can be used to receive a verification code when signing in or signing up. Additionally, if the email is provided, the user can receive the initial password via email.
- 角色/role: All the roles assigned to this user in the system.
- 最后登录时间/last login time: This is the time when the user most recently logged in to the system.
- 创建时间/created time: This is the time when the account was created.
- 状态/status: There are two statuses for a user account.
正常means the user has access to the system, while停用means the user has been disabled and is not allowed to log in to the system. - 操作/actions: Click the icon in this cell, and you will see a dropdown menu:
- 禁用账号/deactivate: This is only shown when the account is in the state of
正常; Click on it will change the status of the account to停用; - 启用账号/enable: This is only shown when the account is in the state of
停用; Click on it will change the status of the account to正常; - 删除账号/delete: Clicking "Delete" will permanently remove the account. Note: If the user is the one you are using to log in to the system, although you have user management permission, which we will introduce in Permission Management, you are still not allowed to deactivate or delete yourself in the user management table.
- 禁用账号/deactivate: This is only shown when the account is in the state of
Search, Filter, and Sort
Of course, like other standard systems, FreeAuth supports filtering, searching, and sorting data in the table. To narrow down the data result, you can input a keyword in the search box or click the filter icon next to the search box and set your specific constraints. Here, FreeAuth provides a combinational filter, allowing you to edit multiple conditions and view only the data that meets your requirements.
To sort data by one field, you can click on the field name in the head cells of the table. For instance, if you want to sort data based on the created time, click on 创建时间, and the data will be sorted. To reverse the order of sorted data, just click on the field name again.

User Details Page
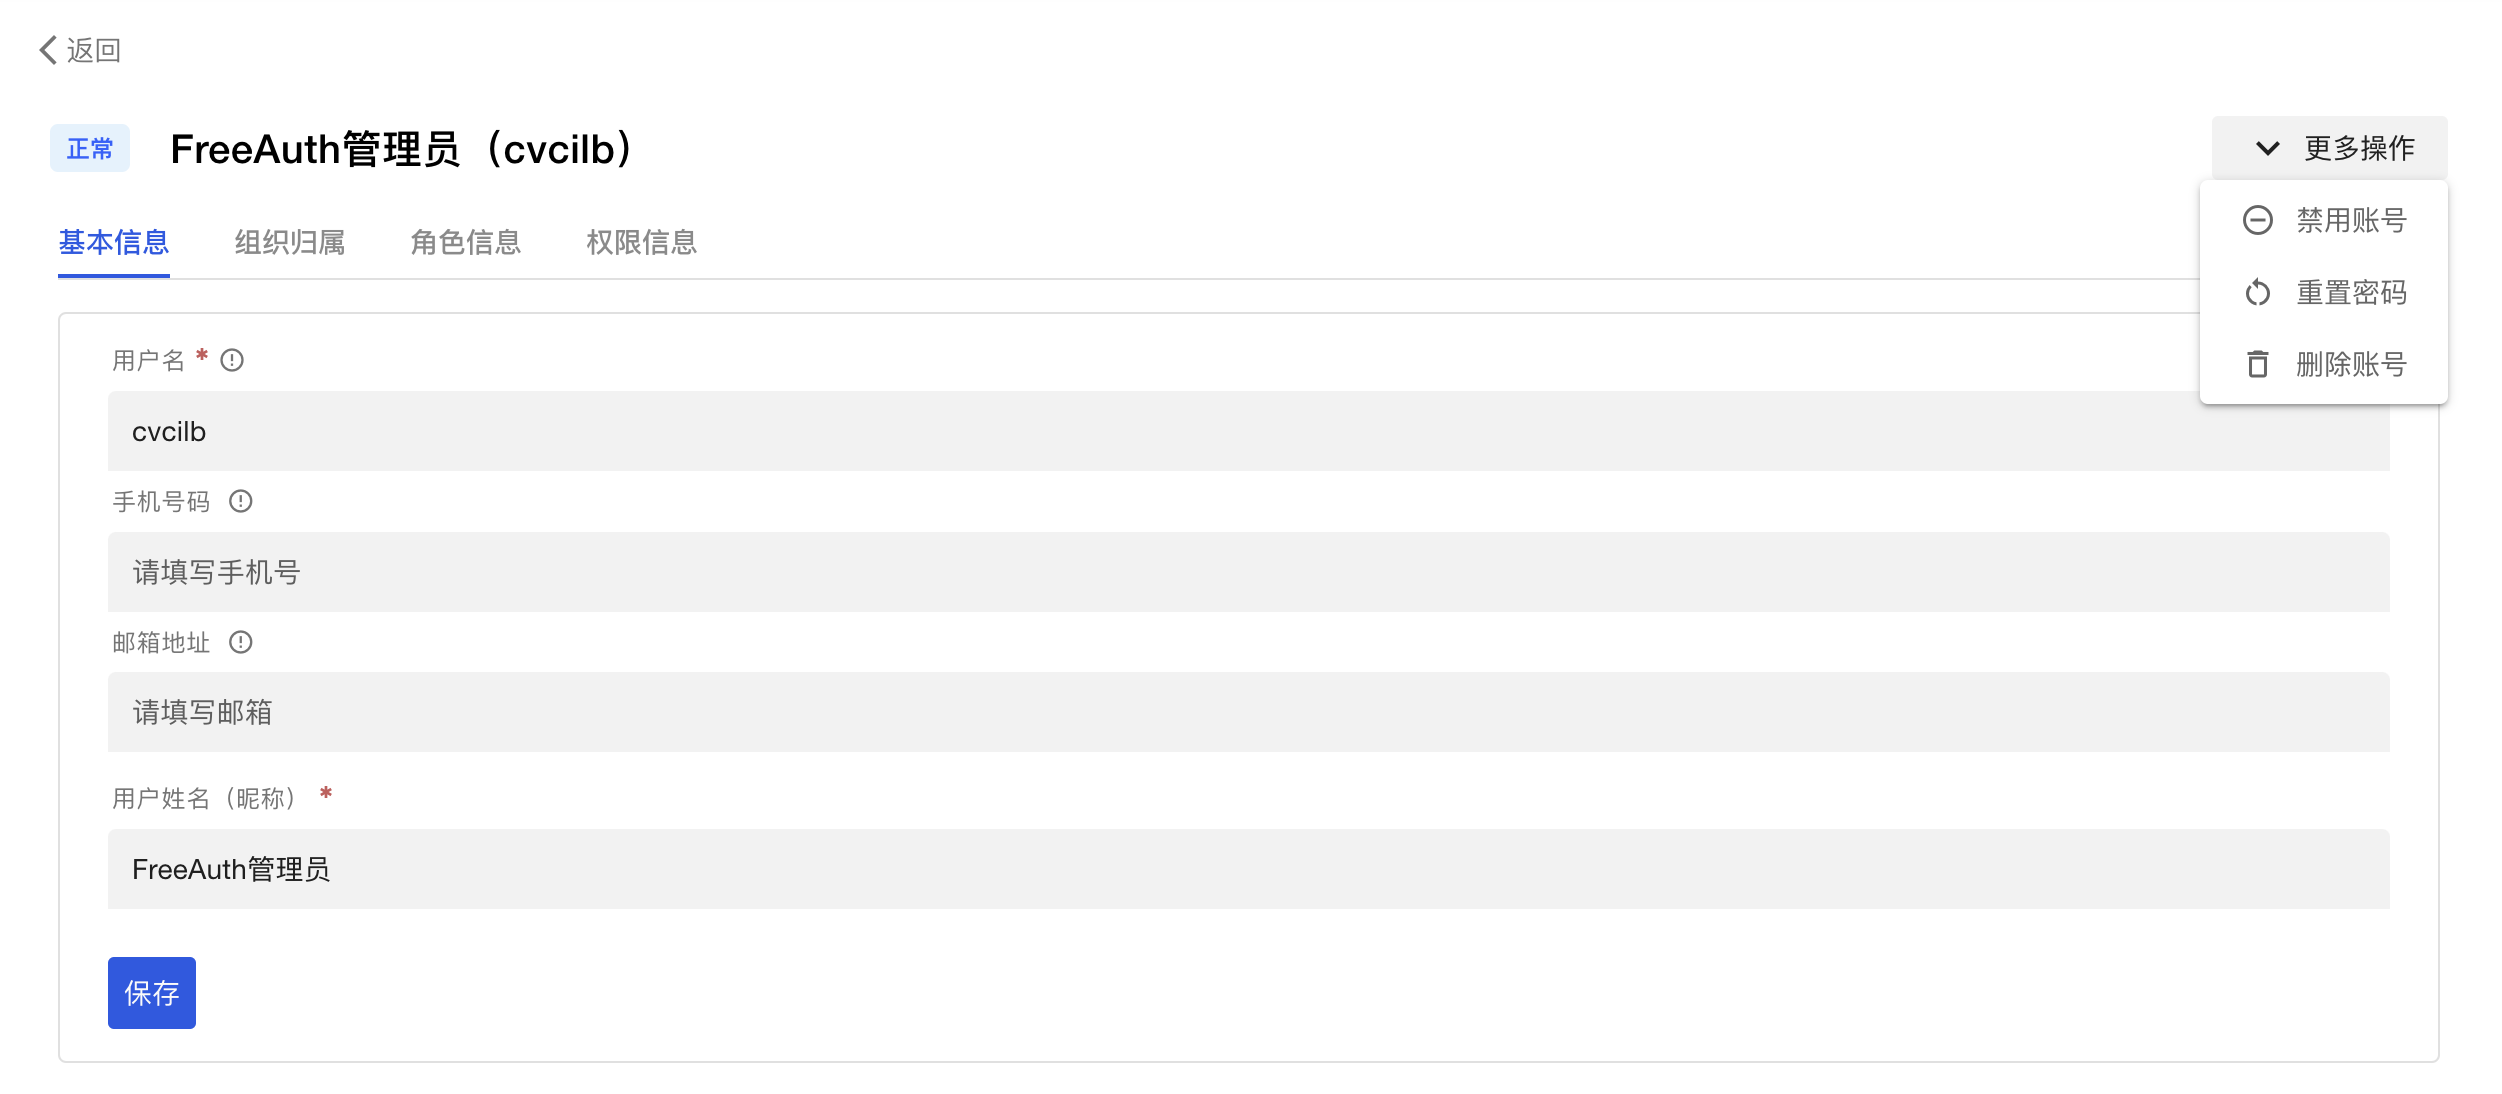
Very likely, you may want to review more information about a user. To do so, you can click the cell of the user's name, such as FreeAuth管理员 in the previous image, and then you will see its details page, including its basic information, organizational affiliation, roles, and authorities:

On this page, you can update a user's basic information, such as username, email, etc., and deactivate or delete this account. Moreover, if you have maintained a valid email for an account, you can reset its password, and the system will email the user the new password.
Regarding the information in the other three tabs, it is necessary to first establish and maintain the data for organizational structure, roles, and permissions, which will be introduced shortly. Thus, let's skip them for a moment and move on to the next topic. Once all essential data is well-prepared, we will explain further the remaining tabs on this user details page.
Create a User
Now, let's have a look at the group of buttons located at the top right of the table. Among them, there is a highlight button labeled 创建用户. As previously noted, new users have the option to sign up for this system by themselves using either their mobile phone number or email address. However, the button 创建用户 is another way available for users who have been granted user management permission to create accounts for new users.

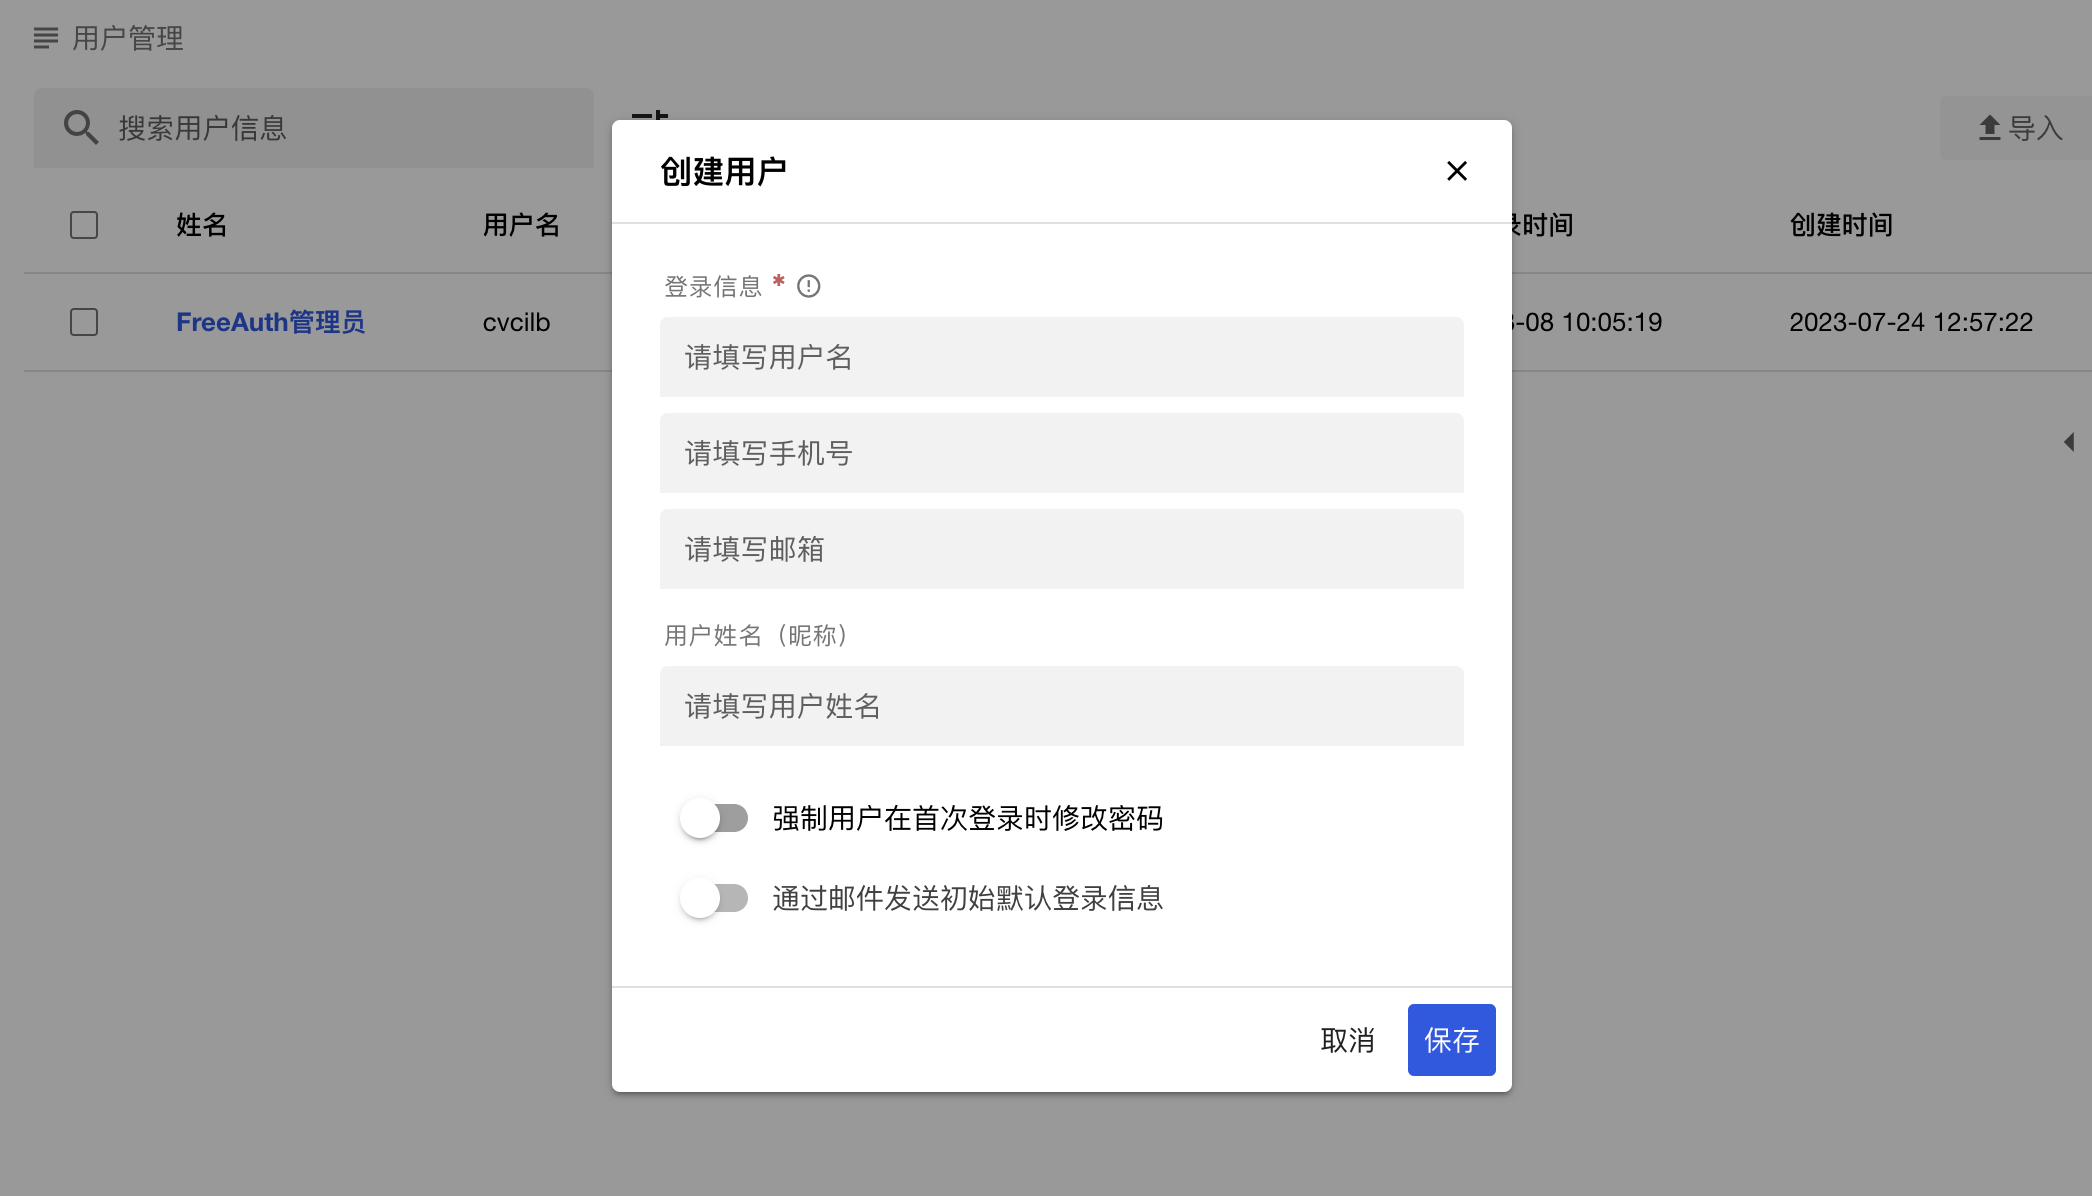
As an administrator with the corresponding permission, to create a new account, click on the 创建用户 button, the new user form will pop up in a dialog:

Here, we are not going to explain too much about each field. As FreeAuth is trying to provide the best user experience, this is a good chance for us to test how friendly it is. You can follow all the texts and hints to finish creating a new account. Only one thing is worth more words here: to make sure to input adequate information for the login mode you set in the previous section.
For example, suppose you only choose to enable the login method with the mobile phone number plus verification code, but you forget to fill in the mobile phone number for the new user here. In this case, this new user will have no way to log in to the system successfully.
Certainly, once the new account is created, it will be displayed in the central table on the current page, such as Daisy Dai appears in the table shown in the following image.
